Honda HSS928A Shear Bolt Keeps Breaking: Find the Overload Before Another Bolt
A repeat-failure HSS928A path that treats the shear bolt as protection for the auger/blower system, checks obstruction and damage, and keeps ordinary hardware out of the repair.
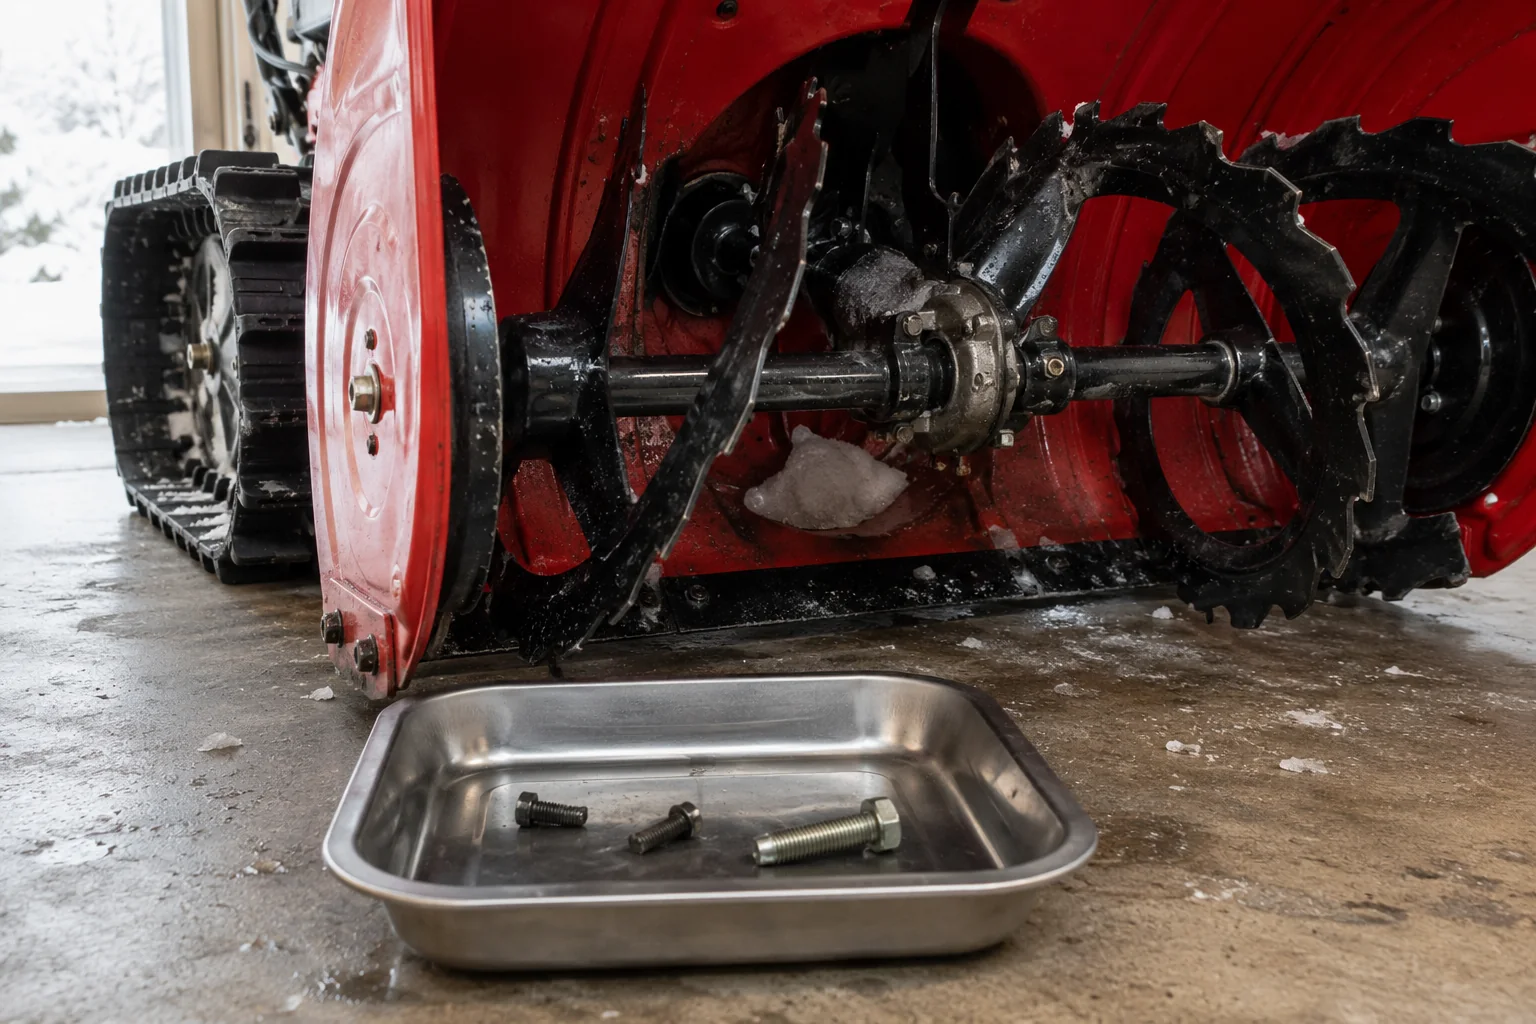
Applies to HSS928A track family (HSS928AAT / HSS928AATD)
Identifiers: HSS928A · HSS928AAT · HSS928AATD · HSS928APT · HSS928APTD · HSS928AT · HSS928ATD
Engine ID: Honda GX270
Frame / description code: SADA
Guide scope: Applies to the HSS928A track family after matching the SADA frame serial to the correct Honda owner manual. Use the model hub serial resolver before part-number or service-manual assumptions.
Honda splits HSS928A owner manuals at frame serial SADA 2020201. Match the full model name, resolve the frame serial range, then record both frame and engine serial numbers before ordering parts or escalating service.
This model has serial-range boundaries — resolve the serial before using a manual →
Honda says the shear bolts are designed to break before force damages the auger and blower. If a correct replacement breaks again, stop feeding the machine bolts and look for a remaining jam, damaged snow-clearing component, wrong hardware or another condition that is repeatedly overloading the system.
Turn the engine switch OFF, disconnect the spark-plug cap and clean snow, ice or foreign material from the auger/blower before replacing shear hardware. Never substitute an ordinary bolt for the specified shear bolt.
Diagnostic sequence
Work in order. The early checks are intentionally low-disassembly and model-specific; stop once the symptom changes or the fault is confirmed.
Resolve the SADA frame serial first
Why this check: Honda splits HSS928A owner manuals at SADA 2020201, so the exact manual and parts trail depends on the machine.
What to do: Match the frame serial on the model hub, then keep both frame and engine serial numbers with the repair record.
Inspect the entire snow-clearing mechanism
Why this check: Honda instructs owners to clean the auger/blower and check the mechanism before fitting a replacement shear bolt.
What to do: With the engine disabled, remove packed snow, ice and foreign objects and inspect auger, blower and housing for visible damage or binding.
Verify that the failed fastener is the correct shear hardware
Why this check: Honda warns that incorrectly sized or ordinary hardware defeats the protection strategy and can damage the machine.
What to do: Use the correct Honda shear-bolt/nut specification for the matched machine; do not upgrade to a harder generic bolt because failures are inconvenient.
Use the failure pattern to find the overload
Why this check: A bolt that breaks only after striking debris tells a different story than a fresh bolt that snaps immediately with a clear housing.
What to do: Record whether failure is instant at engagement, occurs under heavy packed snow, or follows an object strike. An immediate repeat failure warrants deeper inspection before another powered test.
Stop if the auger/blower is damaged or still binds
Why this check: The shear bolt is protecting more expensive rotating components; repeated testing can turn a small fault into gearcase or auger damage.
What to do: Use Honda service support if the mechanism does not rotate/inspect normally after the obstruction and correct hardware are addressed.
How to read this symptom on this model
A shear bolt that breaks once after the auger strikes a hidden object may simply have performed its protective job. A bolt that repeatedly breaks is different: it tells you the auger/blower system is still seeing abnormal load or that the wrong hardware has been installed. Honda specifically instructs owners to clean the auger and blower, inspect the snow-clearing mechanism and use correctly sized shear bolts; the guide therefore treats repeat failure as evidence to investigate, not as a request for a stronger fastener.
The timing of the failure helps. Immediate breakage at engagement with no snow load points toward a bind, damage or unresolved obstruction. Failure only in dense plow berms can instead reflect operating load or a hidden object. That pattern should be recorded before more parts are installed because it narrows the next inspection far better than repeatedly replacing bolts.
The current A159 manual adds a useful parts-control check for SADA 2020201+: it lists separate Honda shear hardware for blower and auger positions and a 6 mm self-locking nut, plus a spare auger shear-bolt kit. Treat those part numbers as A159-range evidence only unless the earlier A157 parts trail independently matches. The important principle across both ranges is unchanged: correctly sized shear hardware must fail before the auger/blower absorbs the overload.
Before the next snow test, compare both auger sides and the blower path rather than treating a newly installed shear bolt as proof the mechanism is free. Honda's owner guidance makes the shear bolt a protective element and directs inspection of the snow-clearing mechanism after an obstruction or failure. If one side binds, a component is bent, or the blower does not rotate freely with the machine safely disabled, stop at that evidence. Repeated no-load shear failures after correct Honda hardware is installed are a stronger reason for service inspection than for experimenting with a harder fastener.
A correct shear bolt that fails again immediately is telling you that the overload remains. Clear the housing, inspect for a bent or jammed auger section and make sure the rotating path is free before installing another bolt. Do not substitute ordinary hardware to “solve” repeat failures; the shear fastener is designed to protect more expensive driveline components. Repeated failure with a clear housing is a reason to stop and inspect alignment or deeper damage, not to increase bolt strength.
A shear bolt that keeps failing is evidence that the protective joint is repeatedly seeing overload; it is not a reason to install stronger hardware. Honda’s HSS928A troubleshooting for no snow discharge includes broken shear bolts alongside a restricted chute, a foreign object stopping the auger and belt trouble, so clear the entire snow path before replacing the bolt. With the engine stopped and all moving parts still, inspect the auger housing and chute for packed ice or an object, then note whether one auger side appears bent, displaced or unusually hard to move under the manual’s safe inspection method. Use only the correct Honda shear hardware for the exact serial/manual split.
Pay attention to when the replacement fails. A bolt that breaks again immediately in a brief no-load test suggests the attachment is still bound or damaged; stop powered testing. A bolt that survives no load but fails repeatedly at the same point in a snow pass suggests an overload that appears under torque, such as housing contact, misalignment or unsuitable auger clearance on rough ground. Honda also warns that insufficient auger ground clearance on rough or uneven surfaces can damage the blower, so preserve surface and skid/auger-height history. If the correct bolt repeatedly shears after obstruction and clearance checks, service is safer than sacrificing more fasteners and risking gearbox or auger damage.
Before you order parts
Before ordering gearcase, auger or blower parts, disable the engine, clear the housing and inspect for bent components, lodged debris and abnormal resistance. Confirm the SADA serial/manual range and use the correct Honda shear hardware. Never “solve” repeat breakage with ordinary or harder bolts; that removes the designed weak link and can move the damage into costlier rotating parts.
Also inspect skid/auger setup when repeat failures correlate with rough ground. Honda warns that insufficient auger ground clearance on rough or uneven surfaces can damage the snow blower. A machine that is repeatedly striking pavement or uneven ground can keep loading the clearing mechanism even after the original obstruction is gone, so correct setup is part of the root-cause check rather than a cosmetic adjustment.
Back to the exact model hub →Retest without creating a second problem
After fitting the correct shear hardware and confirming free, undamaged snow-clearing components, perform only a brief no-load engagement in an open area. Stop immediately if there is abnormal noise, vibration or another shear failure. A second immediate failure after a clear inspection is a service boundary, not a cue to fit a third bolt and keep testing.
If the no-load engagement is smooth, make only a short pass in ordinary snow while watching for the same side, same location and same load pattern that broke the previous bolt. Stop at the first abnormal vibration, contact with the ground or repeat break. A bolt that survives no load but fails only when the housing strikes rough ground points back to clearance/setup or an impact condition, while another failure in a clear, correctly set machine justifies Honda service inspection.
Make sure this is the right symptom
The same search phrase can lead to a different branch on another machine. Compare the nearest model-specific examples: Ariens Deluxe 24 (921069): auger not turning · Ariens Deluxe 24 legacy (921024 / 921045): shear bolt keeps breaking.
Model-specific notes
- Honda’s owner material explicitly treats the shear bolt as a sacrificial protective component.
- A stronger substitute bolt can transfer impact force into auger/blower components instead of solving the root cause.
Questions people get wrong on this model
Can I replace the Honda shear bolt with a regular bolt of the same diameter?
No. Honda specifically warns against ordinary hardware bolts because the shear bolt is designed to fail before more expensive parts are damaged. Honda warns that incorrectly sized or ordinary hardware defeats the protection strategy and can damage the machine. The shear bolt is protecting more expensive rotating components; repeated testing can turn a small fault into gearcase or auger damage.
What if a new correct shear bolt snaps as soon as I engage the auger?
Stop testing and inspect for a remaining jam, bent/damaged rotating part or another mechanical bind. Immediate repeat failure is evidence of continuing overload. The shear bolt is protecting more expensive rotating components; repeated testing can turn a small fault into gearcase or auger damage.
Does repeated shear-bolt failure mean the Honda bolt is too weak?
Not necessarily. The shear bolt is supposed to protect the driveline. Repeated failure with the correct hardware is stronger evidence of a continuing jam, freeze-up, misalignment or impact load than a reason to install a stronger generic bolt. A bolt that survives no load but fails only when the housing strikes rough ground points back to clearance/setup or an impact condition, while another failure in a clear, correctly set machine justifies Honda service inspection.
Primary-source trail
Manufacturer material used for this diagnosis. Verify the model/serial range before ordering parts or applying an adjustment.
Honda HSS928A owner manual 00X31V45 A157Official troubleshooting, serial-number, operating and specification tables for HSS928A frame serial SADA 1000001–2020200.cdn.powerequipment.honda.com →Honda HSS928A owner manual indexOfficial serial-to-manual crosswalk; HSS928A changes to manual A159 at SADA 2020201.powerequipment.honda.com →Honda HSS928A owner manual 00X31V45 A159Official current-range manual for HSS928A frame serial SADA 2020201+; troubleshooting tables retain the same core no-start, drive and snow-handling branches.cdn.powerequipment.honda.com →Honda HSS928AT / HSS928ATD product supportHonda Power Equipment product data for full model names, GX270 engine, hydrostatic track drive, electric joystick chute and AT versus ATD starting-system differences.powerequipment.honda.com →